Thinking about listing your West Lake Hills home in the next few months? In a market that prizes view lines, privacy, and polished outdoor living, the right prep can shift first impressions and final numbers. This guide gives you a local 3 to 6 month plan, a focused 30 day checklist, and a clear sequence for staging and photography tailored to sloped, treed lots. Let’s dive in.
What West Lake Hills buyers value
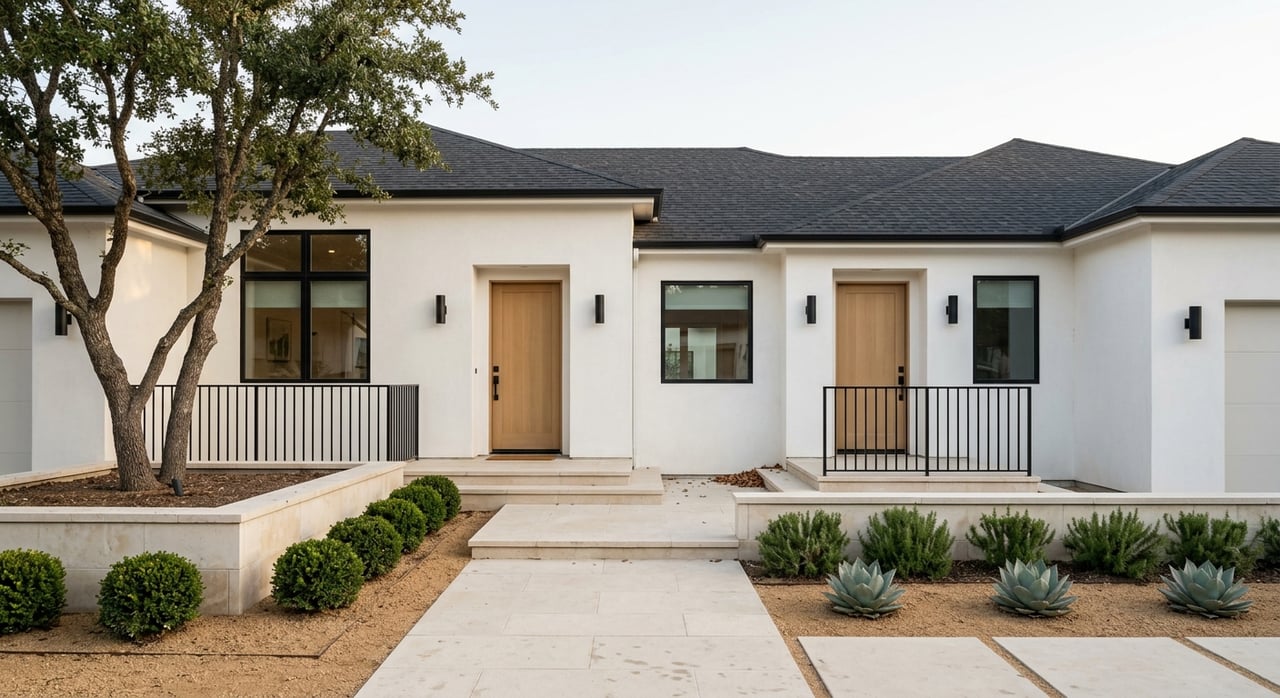
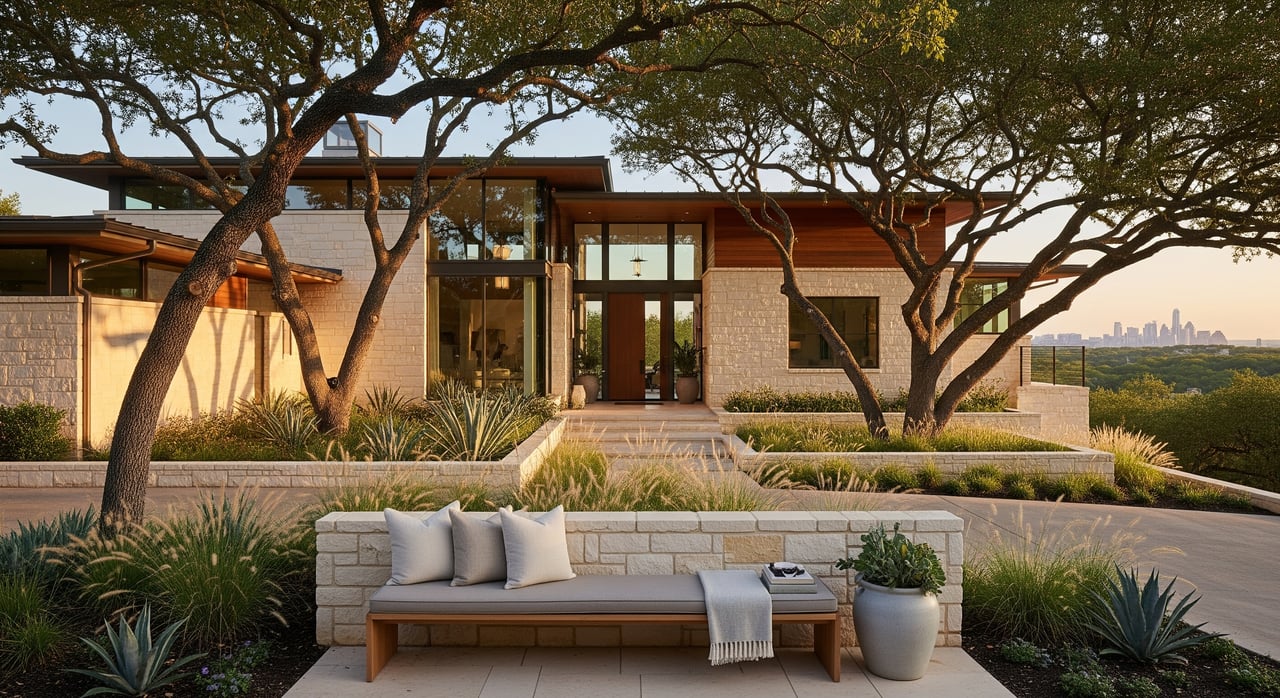
West Lake Hills buyers often look for clean curb presentation, safe access on sloped drives and walkways, and landscaping that frames views rather than blocks them. Many properties trade on view corridors and mature trees, so pruning and sightline management matter. Drought-tolerant, low-maintenance plants signal ease of ownership in our Central Texas climate. Entry experience and exterior materials set the tone before a buyer ever steps inside.
Plan ahead: permits and timing
West Lake Hills is an incorporated city with its own development codes. Retaining walls, major grading, new driveways, or structural exterior work can require permits or engineering review. If your lot includes steep slopes, expect rules related to drainage, erosion control, and tree protection, and some watersheds can trigger additional requirements.
Engage city and county resources early if you are considering grading, retaining walls, or major landscape redesign. Projects that need heavy machinery or tree work should be scheduled first so you have time for approvals and cleanup. Before you finalize your prep budget, review the latest 30 to 90 day market trends through Austin Board of REALTORS market reports and the local MLS so your investment matches current buyer expectations.
High-ROI prep priorities
Curb appeal on sloped lots
- Prioritize safety and access. Create clear, stable walk lines with terracing, gravel steps, or small retaining solutions where appropriate. Address drainage before cosmetic upgrades.
- Simplify the front approach. Remove overgrowth that blocks sightlines or views, and edge beds so the entry sequence reads clearly from the street.
- Use native, drought-tolerant plants. Consider Texas sages, yucca, mountain laurel, Turk’s cap, and Texas red yucca with permeable mulch or stone for easy upkeep.
- Clean visible hardscape. Power wash and repair driveways, walkways, and masonry that show in photos.
- Prune to enhance views while preserving privacy and scale. For protected trees or complex canopies, consult an arborist.
Permits may apply for grading or retaining work. Heavy equipment can affect tree roots, so plan access paths and protection measures in advance.
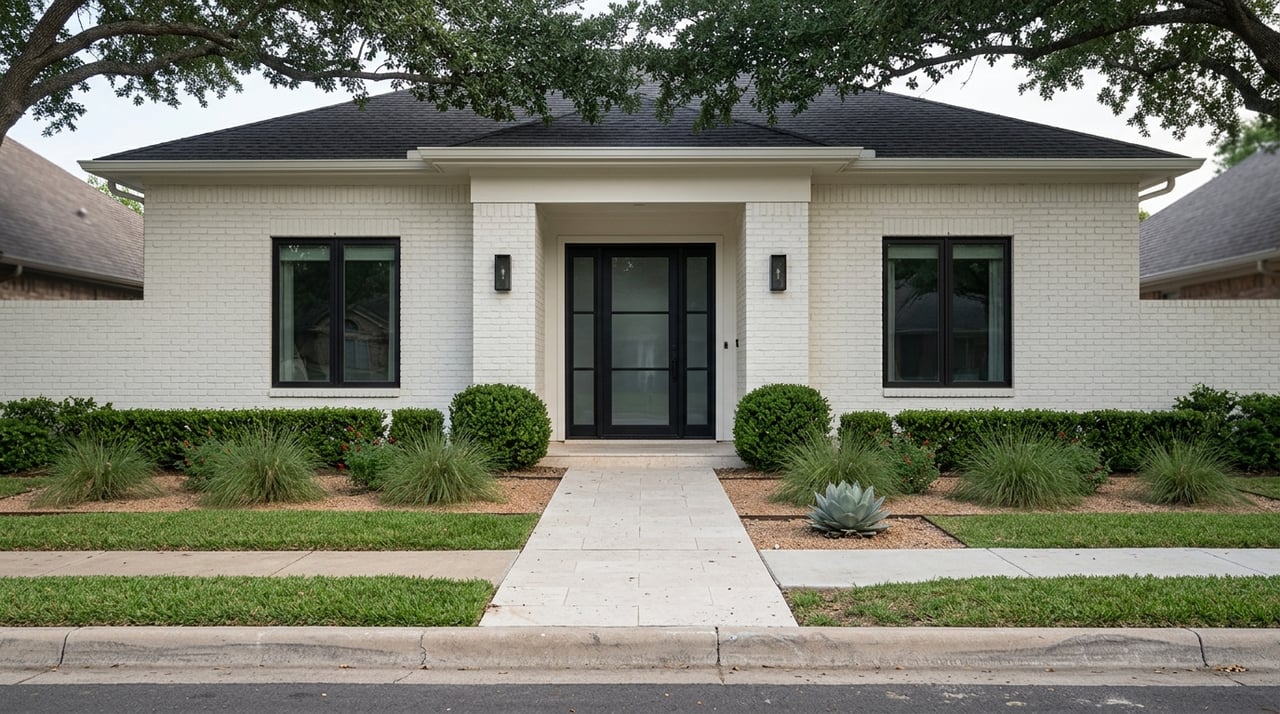
Exterior paint and materials refresh
Fresh, neutral exterior paint and repaired siding can transform first impressions and photograph beautifully. Buyer research and industry remodeling reports consistently rank exterior paint and siding updates as cost-effective curb improvements.
- Inspect and repair first. Address siding, fascia, gutters, and soffits. Replace rotted trim and re-caulk seams.
- Select a calm, market-appropriate palette. Light, neutral body colors with slightly lighter or darker trim typically read well in photos.
- If full replacement is not feasible, targeted repairs and a fresh coat often deliver near-comparable perception gains at a lower cost.
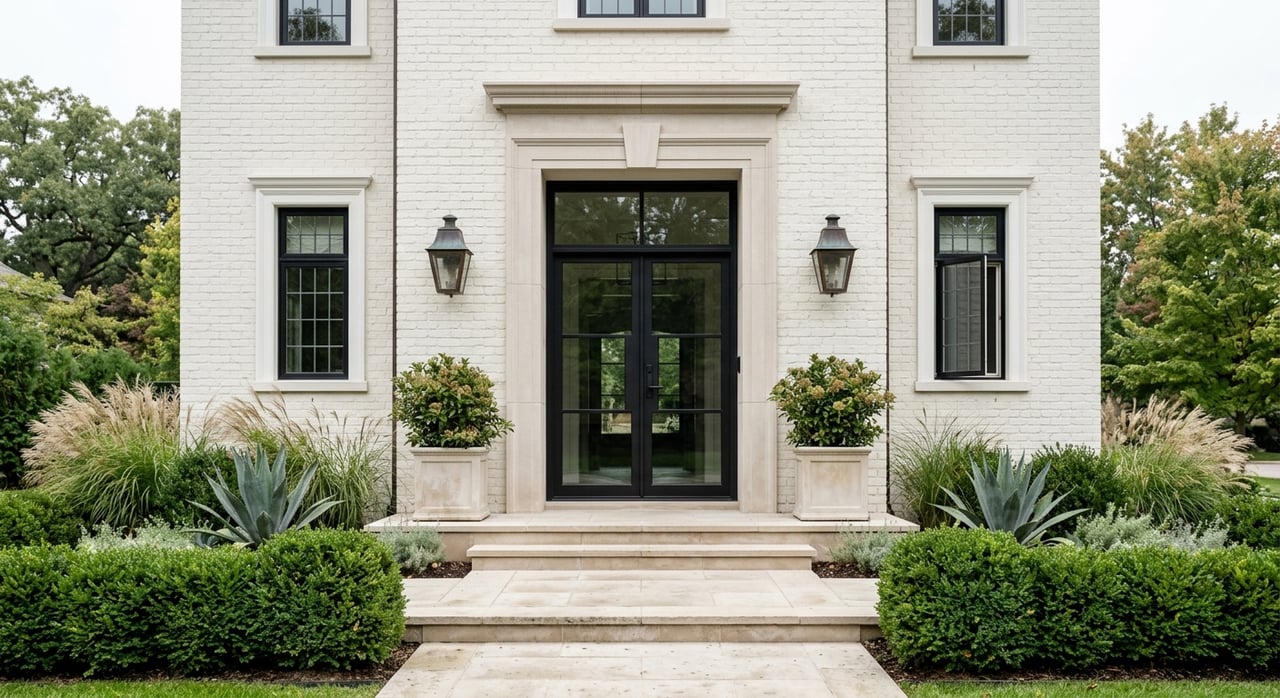
Lighting updates inside and out
Thoughtful lighting elevates safety, enhances architecture, and adds drama to twilight photography. LED upgrades also reduce operating costs.
- Add low-voltage LED path, step, and accent lighting to highlight walkways, stairs, and key features. Use motion-sensing fixtures for select areas.
- Update porch and entry fixtures to clean, timeless styles. Aim for warm-white bulbs around 2700 to 3000K for a welcoming glow in photos.
- Refresh key interior fixtures in the kitchen, living areas, and the primary bedroom. Choose simple, neutral designs with appropriate brightness.
Exterior materials: roof, gutters, driveway, decks
Prioritize what buyers see and what inspectors flag.
- Safety and defects first. Fix loose deck rails, missing shingles, and trip hazards.
- Photo-impact items next. Clean or repair the roof, power wash stone or brick, and refresh or replace a tired garage door if needed.
- Select durable, low-maintenance materials suited to Central Texas heat and sun. Garage door replacements, minor porch improvements, and manufactured stone accents often show strong resale appeal per remodeling data.
Interior quick wins tied to exterior
- Touch up interior paint in main areas so the entry flows. Keep walls clean and neutral.
- Declutter the foyer, kitchen counters, and visible storage. Consider off-site storage for overflow.
- Address odors, moisture stains, or roof leaks immediately. These are instant buyer turnoffs and show in photos.
Photography and staging sequence
Photograph the best version of your home, then go live. Sequence prep so your listing launches with a complete, polished media set.
- Complete major exterior work and landscaping first. Allow time for settling, cleanup, and punch lists.
- Finish exterior paint, trim repairs, new fixtures, and hardscape cleaning so everything shows well on camera.
- Install and test exterior lighting. Confirm placement at dusk in advance of twilight photography.
- Tackle interior paint touch-ups, minor repairs, and deep cleaning once exterior work is done.
- Stage and finalize furniture placement before photography. Do not shoot before staging is complete.
- Schedule professional daytime and twilight photos on clear days within 1 to 3 days after staging.
- Add aerial or drone shots when landscaping is settled. Verify local drone regulations and property permissions.
Special to West Lake Hills: leverage elevated or drone angles for lot shape, slope, and proximity to natural features. Use twilight shots to showcase outdoor lighting and usable evening spaces. Lead the photo gallery with a compelling exterior or view image, then highlight main living areas, outdoor living, and secondary spaces.
30 day launch checklist
The list below assumes major projects are already completed or underway. Focus now on polish and presentation.
Days 30 to 21
- Confirm final scope and timeline with your vendor coordinator or agent.
- Wrap exterior repairs to siding, trim, gutters, and any visible roof items.
- Pressure wash driveway, walkways, patios, and siding where appropriate.
- Finish landscape cleanup. Prune, weed, edge beds, and replace dead plants. Add fresh mulch.
- Refresh entry hardware. Update mailbox, house numbers, and porch or entry fixtures if needed.
Days 20 to 14
- Complete exterior and interior paint touch-ups in high-traffic and photo-heavy rooms.
- Install or confirm exterior lighting placement and test at dusk.
- Declutter interiors, closets, garage, and surfaces. Use off-site storage for excess items.
- Schedule a professional move-in style clean for 3 to 5 days before photography.
Days 13 to 7
- Finalize staging. Secure rentals or styling, and remove personal, religious, or political items.
- Service HVAC and replace filters. Confirm mechanical systems perform as expected.
- Complete last cosmetic fixes like cabinet hardware and switch plates. Set out fresh towels and linens.
Days 6 to 3
- Install professional staging if used.
- Walk through with your agent or vendor coordinator to confirm photo readiness.
- Confirm daytime, twilight, and drone appointments with your photographer.
Days 2 to 1
- Complete professional photography in daylight. Capture twilight shots at dusk on the same or next day.
- Add floorplans, virtual tour, and any neighborhood context shots.
- Finalize pre-listing paperwork and disclosures with your agent. Set up lockbox and showing instructions.
Day 0
- Go live after final approval of photos and description.
- Coordinate open house or broker preview timing with your agent.
Keep these on hand
- Vendor contact list and receipts for improvements.
- Warranties and permit documents for recent work.
- Key and access details, and a staging inventory list.
Where concierge coordination fits
A concierge vendor coordinator keeps your timeline and vendors moving in the right order. This role manages bids, checks licensing and insurance, and recommends pros who understand West Lake Hills topography and permitting. They also coordinate staging and professional photography so your home is captured in peak condition.
Engage the concierge early in the 3 to 6 month window if your plan includes grading, retaining walls, driveway work, or significant landscape changes. If you come in later, a coordinator can still prioritize high-impact fixes and tighten the final 30 day sequence. This service does not replace engineering where required, and you still approve budgets and contracts. Expect a clear scope that explains fee structure, deliverables, and any vendor markups.
Next steps
If you want a smooth, high-impact launch, focus first on safety and structure, then elevate curb appeal, paint, and lighting. Finish with staging and a tight photo plan, and time your go-live once the full media package is ready. For tailored guidance, scheduling, and vendor coordination, connect with the Jamie Novak Group to map your prep plan and timeline.
FAQs
What should West Lake Hills sellers prioritize before listing?
- Start with safety and visible repairs, then enhance curb appeal with view-friendly pruning, fresh exterior paint, and updated lighting before staging and photography.
Do I need a permit for retaining walls or grading in West Lake Hills?
- Many retaining walls, major grading, and driveway changes can require city review or permits, so contact the City of West Lake Hills early to confirm requirements.
Which plants work best for low-maintenance curb appeal locally?
- Native, drought-tolerant options like Texas sages, yucca, mountain laurel, Turk’s cap, and Texas red yucca create clean lines and reduce watering needs.
When should I schedule twilight and drone photos for a sloped lot?
- Schedule both after exterior work, lighting, and staging are complete, and when landscaping has settled, then choose a clear evening for twilight shots.
How does a concierge vendor coordinator help with pre-list prep?
- They vet and schedule vendors, manage permits and inspections, maintain a master timeline, and coordinate staging and photography for a clean, on-time launch.
How do I align my prep budget with current market conditions?
- Review the most recent 30 to 90 day Austin Board of REALTORS and MLS trends with your agent to calibrate finish levels and prioritize the highest perceived returns.